Softbody setup
Once you've got a properly setup solver, you can add softbody actors to it. Setting up a softbody actor involves 2 steps:
- Creating the the softbody actor itself.
- Generating and assigning a softbody blueprint to the actor.
Creating a softbody actor
To create a new softbody actor, go to GameObject→3D Object→Obi→Obi Softbody. This will create a new GameObject in your scene and endow it with a softbody actor component and a softbody skinner component.

If you've got an existing object that you want to turn into a softbody, you can add the required components from the Component→Physics→Obi menu, or the AddComponent button in the inspector.
Creating a softbody blueprint
To create a softbody blueprint, go to Assets→Create→Obi→Surface softbody blueprint, or right-click on a project folder and select Create→Obi→Softbody surface blueprint.
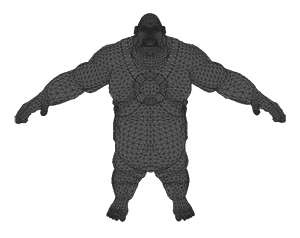
A softbody blueprint takes a mesh as input, and generates a physical representation of it made out of particles and constraints. Particles will be placed at the mesh's surface / volume / skeleton (depending on your blueprint settings, see below) and shape matching clusters to hold these particles together. This is how the blueprint inspector looks like:
Input Mesh
Mesh used for particle / cluster generation. Any mesh will work, including non-manifold meshes and polygon soups.
Scale
Scale applied to your mesh before using it to generate blueprint data.
Rotation
Rotation applied to your mesh before using it to generate blueprint data.
Once you've provided a mesh, the initially grayed out Generate button at the bottom of the inspector will become usable. Upon pressing this button, particles and clusters will be generated using the parameters you've set for each of the 4 generation stages:
- Surface sampling
- Volume sampling
- Skeleton sampling
- Shape analysis
If you modify any parameter of any of the stages, you will need to click the Generate button again to apply the changes.
Surface sampling

This stage will distribute particles on the surface of your mesh.
Mode
- None
- No particles will be generated for the surface of the mesh.
- Vertices
- Particles will be placed at the vertices, allowing little to no particle overlap. Clusters will be generated using the mesh edges, so they will follow the mesh topology as closely as possible. At lower resolutions, particle and cluster placement may not preserve mesh symmetry.
Vertex sampling,resolution 8. 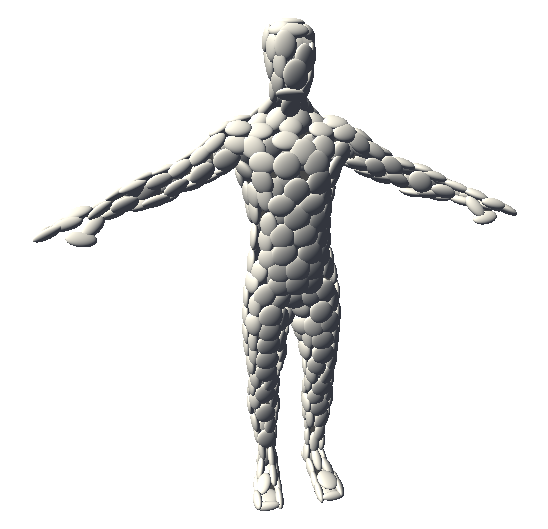
Vertex sampling,resolution 32. 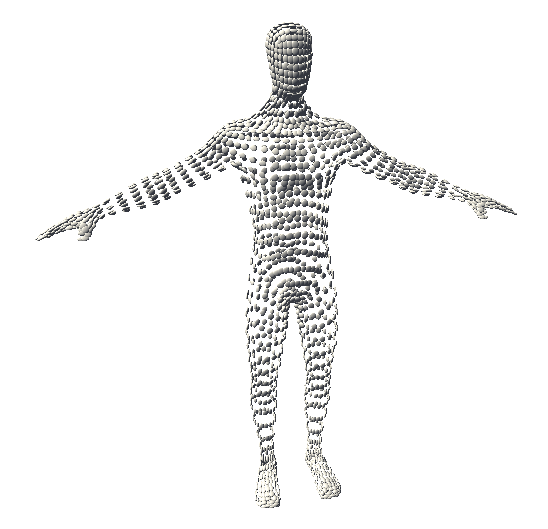
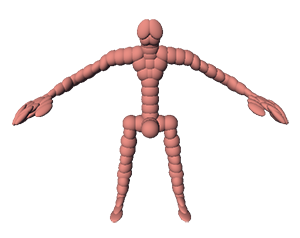
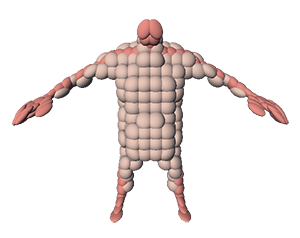
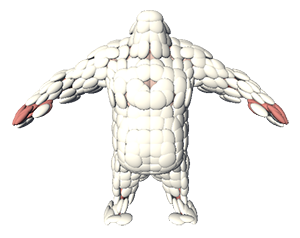
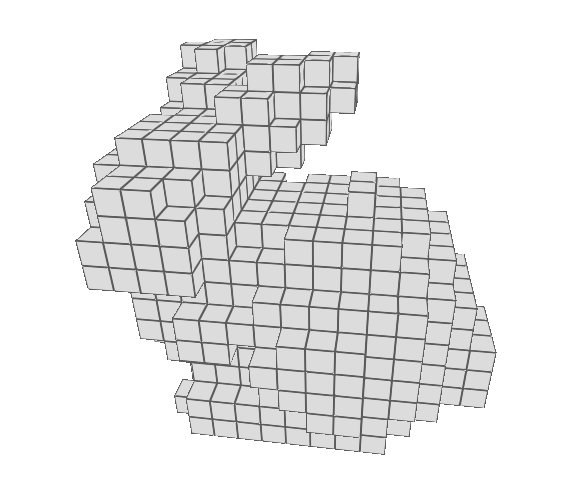
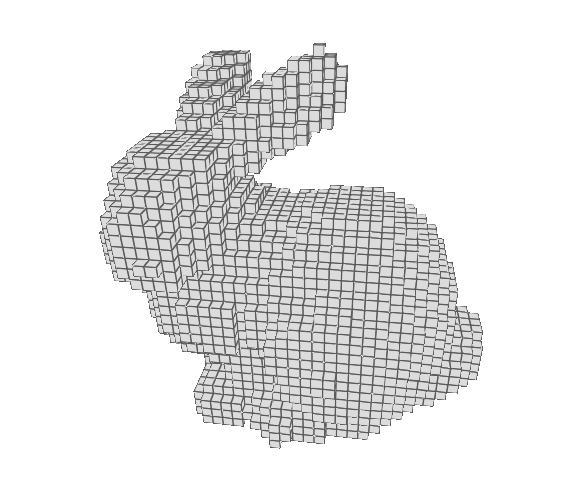
At max resolution, one particle per vertex is created. - Voxels
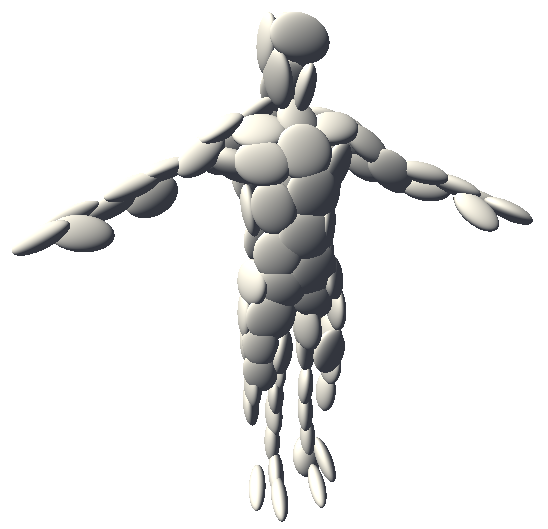
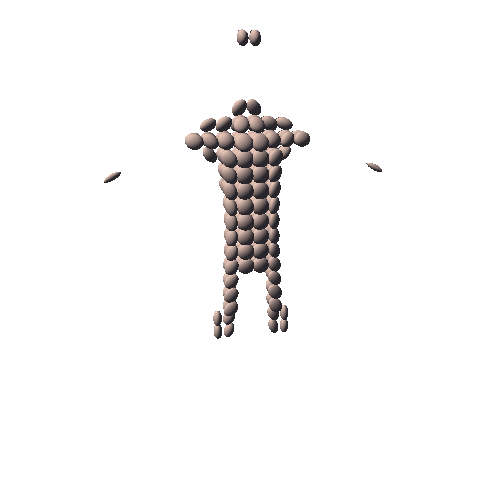
- The surface of the mesh will be voxelized, one particle placed at the center of each voxel, then projected to the closest point on the surface of the mesh. Clusters will be generated based on voxel adjacency. This guarantees that given a symmetric input mesh centered at the origin, particle and cluster placement will also be symmetric.

Voxel sampling,resolution 16. 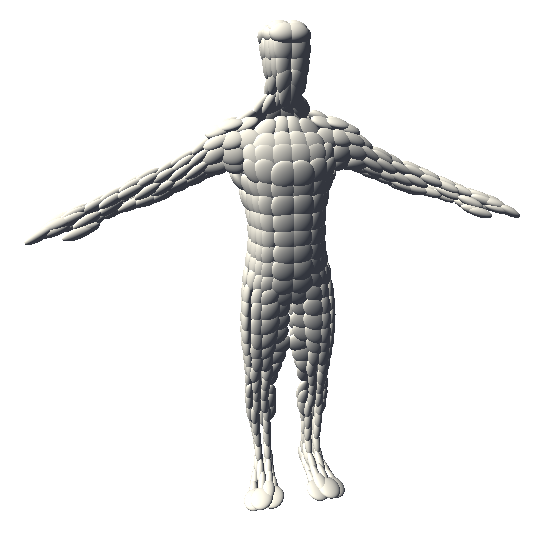
Voxel sampling,resolution 32. 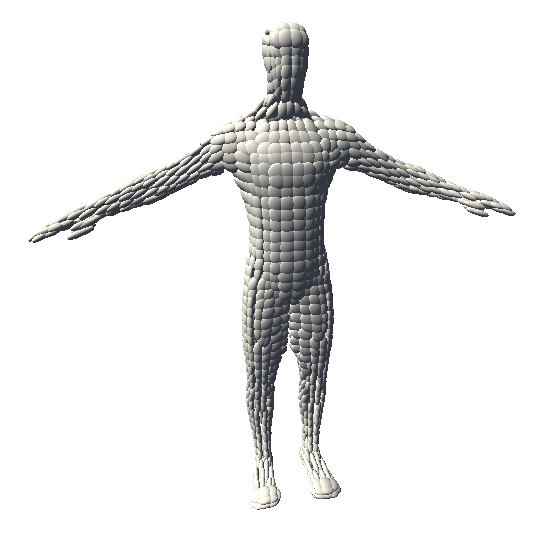
Voxel sampling,resolution 48.
Resolution
This controls how fine grained particle sampling will be. Higher resolution values will use more smaller particles. Lower values will use less, larger particles.
Volume sampling

This stage will distribute particles in the volume of your mesh. Note that if your mesh does not enclose any volume, this stage might generate no particles.
Mode
- None
- No particles will be generated for the volume of the mesh.
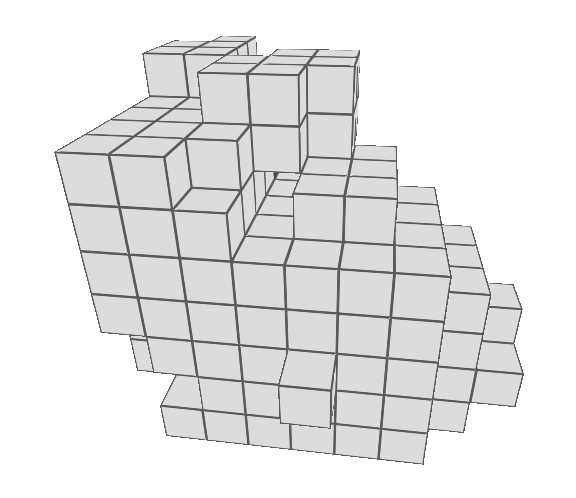
- Voxels
- The volume of the mesh will be voxelized, and particles placed at the center of each voxel. Clusters will be generated using voxel adjacency.
Volume sampling,resolution 32. 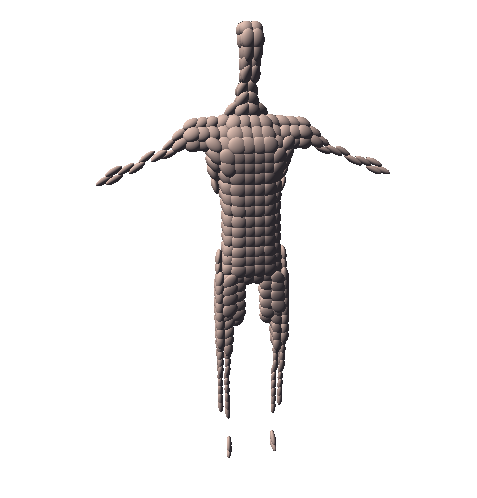
Volume sampling,resolution 48. 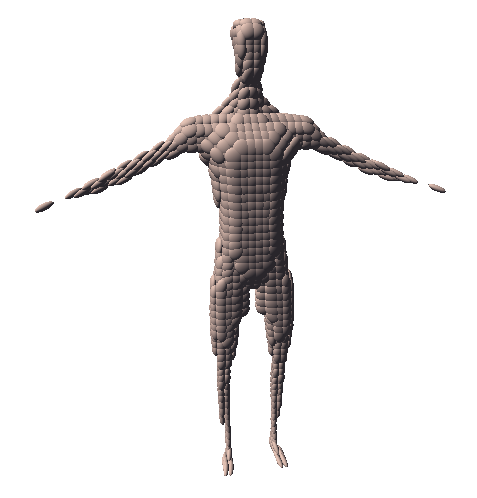
Volume sampling,resolution 64.
Resolution
This controls how fine grained particle sampling will be. Higher resolution values will use more smaller particles. Lower values will use less, larger particles.
Skeleton sampling
You can optionally ask Obi to generate particles for a character skeleton. These particles can be driven using animation, and in turn affect volume/surface particles around them. This results in what we call a full-body volumetric softbody, or FBVS for short.
Hence, a FBVS is a 3-layer model of a real body: bone particles approximate the skeleton, volume particles approximate the body's fat & muscles, and surface particles approximate skin.
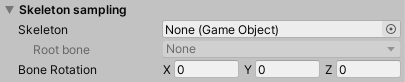
Skeleton
GameObject that contains the skeleton you want to use.
Root Bone
This dropdown lets you select the specific bone in the skeleton's hierarchy used as the root bone.
Bone rotation
Rotation applied to the skeleton before sampling it with particles.
Shape analysis

As a final step, Obi will perform some additional shape analysis of your input mesh. This has two purposes: to adjust the shape and position of your particles to better fit the mesh, and to discard invalid clusters. Shape analysis is performed by voxelizing the mesh, and determining the shape of the local neighborhood around each voxel.
Resolution
This controls how fine voxelization will be. Higher resolution values will make blueprint generation slower, but will yield better quality results.
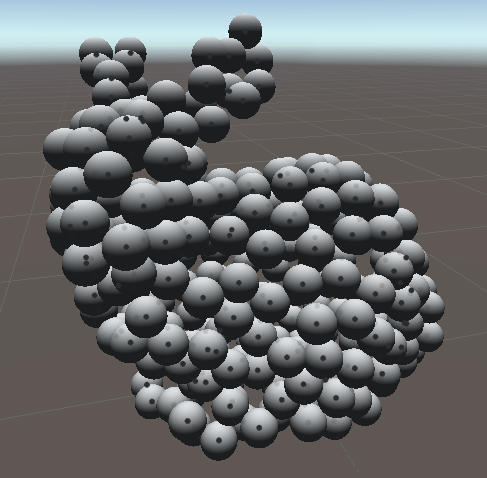
Max anisotropy
Maximum ratio between the longest axis of a particle and its shortest one. Large values will result in a very pronounced ellipsoidal shape for particles. Small values will result in rounder, more spherical particles.
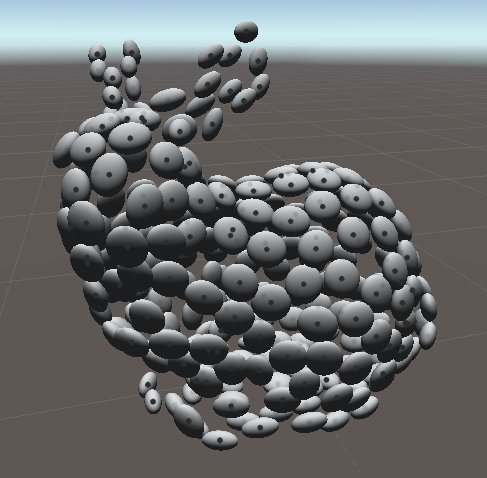
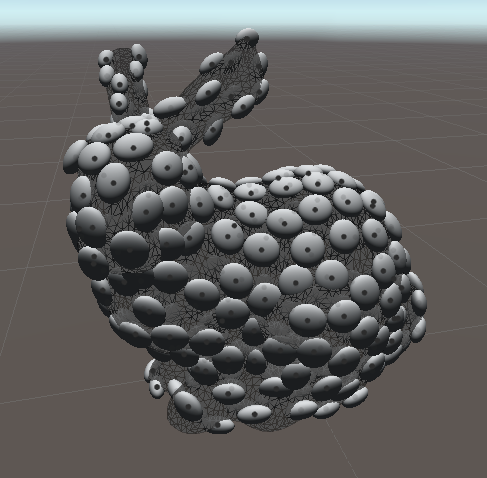
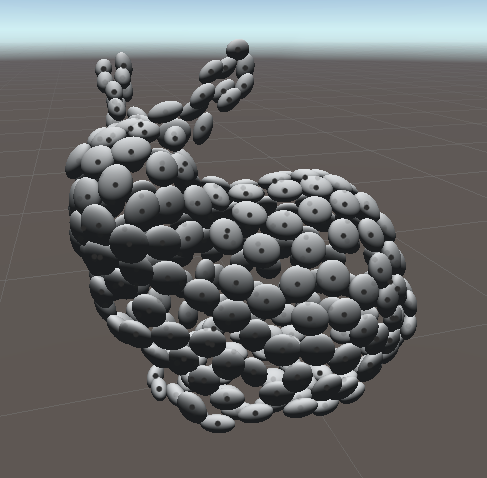
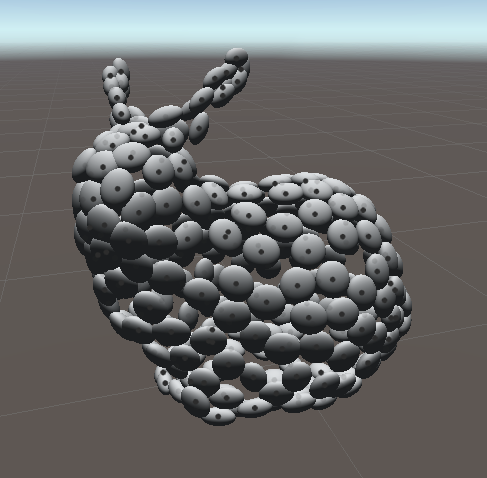
Shape Smoothing
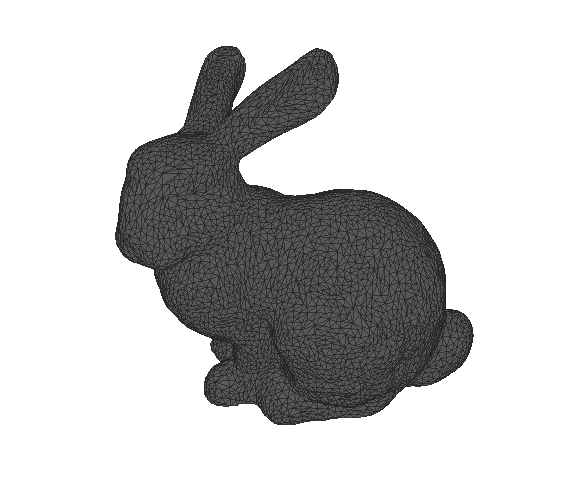
Amount of laplacian smoothing applied to particles. Large values can help in representing thin features such as antennaes and limbs with linear particle chains. In the following images, this is most noticeable in the bunny's ears: they get thinner as smoothing increases.
Generation is a process can take quite a while. Once it is done, the initially grayed out Edit button will become active. By pressing it you will enter the blueprint editor. See the blueprint editor page for details.
Feeding the blueprint to the actor
Once you've got a blueprint ready, all you need to do is assign it to the actor's blueprint property. If everything is setup properly, upon pressing "Play" you'll see your softbody being simulated.

Advanced: binding arbitrary meshes to a softbody actor
By default, the blueprint's input mesh is also used to render the softbody actor. However, you can opt to use a different mesh for rendering, and it's even possible to have multiple different meshes bound to the same softbody actor. This effectively decouples the physical representation of the softbody from its graphical representation. For information on how to set this up, see softbody rendering.