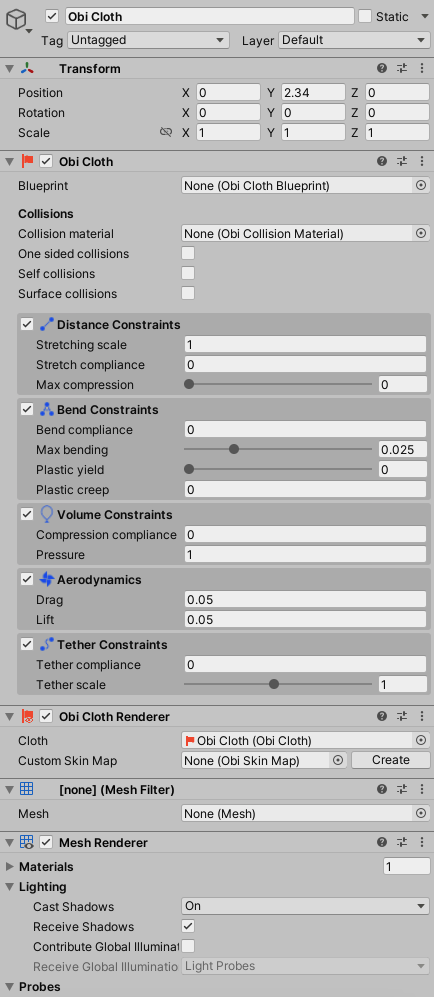
Cloth setup
Setting up a cloth actor involves 2 steps:
- Creating the the cloth actor itself.
- Generating and assigning a cloth blueprint to the actor.
Creating a cloth actor
There are 3 different cloth flavors in Obi, each one designed for a specific purpose:
- Obi Cloth:
- Regular cloth. Cannot be torn, cannot be used with animated meshes. This is the most efficient of the 3.
- Obi Tearable cloth:
- Can be torn, cannot be used with animated meshes. This tearing capability has an associated memory and runtime cost.
- Obi Skinned cloth:
- Designed to be used with skeletally animated meshes for character cloth, cannot be torn.
To create a new cloth actor, go to GameObject→3D Object→Obi→Obi Cloth/Obi Tearable Cloth/Obi Skinned Cloth. This will create a new GameObject in your scene and endow it with a cloth actor component and a matching cloth renderer component of the flavor you selected.
If you've got an existing object that you want to turn into a cloth, you can add the required components from the Component→Physics→Obi menu, or the AddComponent button in the inspector. This is specially useful when setting up cloth for an existing SkinnedMeshRenderer.
Creating a cloth blueprint
To create a cloth blueprint, go to Assets→Create→Obi→Cloth blueprint/Tearable cloth blueprint/Skinned cloth blueprint, or right-click on a project folder and select Create→Obi→Cloth blueprint/Tearable cloth blueprint/Skinned cloth blueprint.
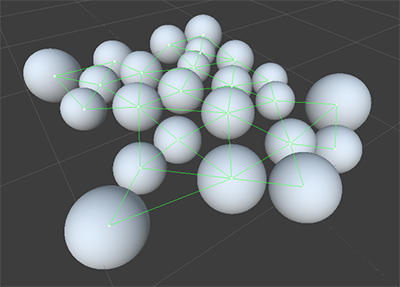
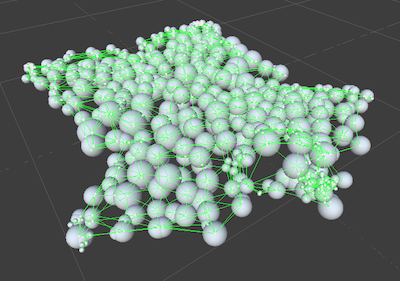
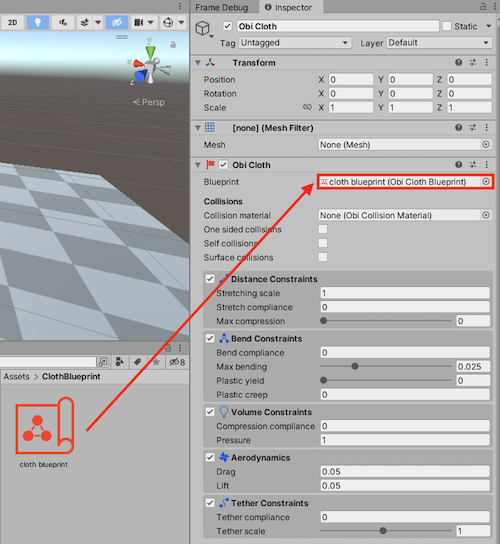
A cloth blueprint takes a mesh as input, and generates a physical representation of it made out of particles and constraints. First the mesh is decimated by collapsing small edges, then one particle is created at each vertex's position, and one distance constraint created at each edge to link particles together. This is how the blueprint inspector looks like:
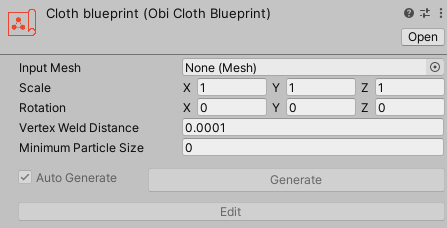
Input Mesh
Mesh used for particle / cluster generation. Any mesh will work, including non-manifold meshes and polygon soups.
Scale
Scale applied to your mesh before using it to generate blueprint data.
Rotation
Rotation applied to your mesh before using it to generate blueprint data.
Vertex weld distance
Vertices that are closer than this distance will be merged together, regardless of connectivity (edges). This is useful to generate single-layered cloth out of double-sided meshes.
Minimum particle size
The mesh will be decimated by collapsing edges until all particles are at a distance larger than this value. This process preserves vertex connectivity, which is useful when you want to simplify a mesh without bridging gaps in between vertices.
Once you've selected an input mesh and adjusted parameters to your liking, you can press the Generate button in the blueprint inspector. This will trigger the generation proccess - can take quite a while for large meshes - during which the following steps take place automatically:
- All vertices in the mesh closer than the specified vertex weld distance are fused together.
- The resulting mesh is decimated up to the specified minimum particle distance.
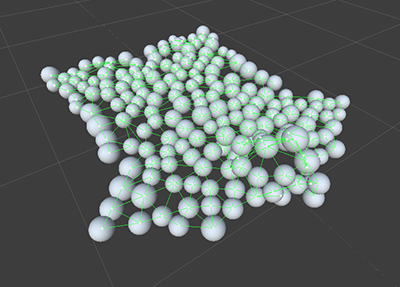
- Once the mesh has been decimated, one particle per vertex and one distance constraint per edge are generated.
- The resulting particle/distance constraint network is analyzed to generate bending, volume, and aerodynamic constraints.
- All constraints are sorted and grouped into batches for efficient runtime evaluation.
Once generation is completed, the Edit button will become active. By pressing it you will enter the cloth blueprint editor, which allows you to further edit the particle and constraint data stored in the blueprint.
Feeding the blueprint to the actor
Once you've got a blueprint ready, all you need to do is assign it to the actor's blueprint property. If everything is setup properly, upon pressing "Play" you'll see your cloth being simulated.
Advanced: binding arbitrary meshes to a cloth actor
By default, the blueprint's input mesh is bound to the resulting cloth particles and used to render the cloth. However, you can use completely different meshes to generate the cloth blueprint and render the cloth, and it's even possible to have multiple different meshes bound to / deformed by the same cloth actor. This effectively decouples the physical representation of the cloth from its graphical representation. For information on how to set this up, see cloth rendering.