You need to own Obi Cloth asset for these features
Use Case: Character Clothing Using Proxies
This example goes in detail about how to replicate the trenchcoat sample scene included in Obi Cloth 3.0.
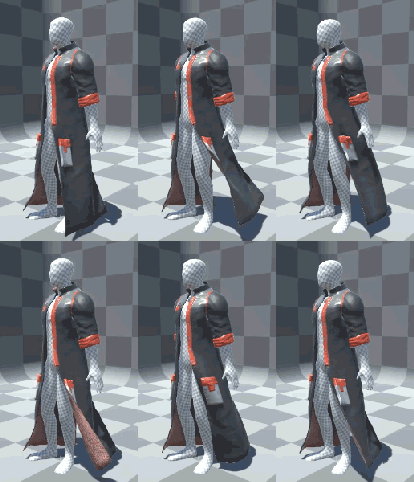
Using proxies you can efficiently simulate complex character clothing with multiple layers.
In this example, we will use the trenchcoat mesh included in Obi 3.x. You can use any mesh you want, but remember that it has to contain skinning information (in other words, it has to use a SkinnedMeshRenderer) and should have a clean topology (no non-manifold structures).
First of all, we will set up the trenchcoat as we would with any other skinned cloth: generate a ObiMeshTopology asset for the trenchcoat mesh, add an ObiCloth component to the SkinnedMeshRenderer, and initialize the cloth. You can read about all of this in detail here and here, as we won't go into further detail abou the basic setup here.
Note that we haven´t mentioned the ObiSolver component yet. Obi 3.x allows you to choose the space in which the simulation will be performed: world space or local space. Now, if we were to simulate the trenchcoat in world space, things would work ok for the most part. This is the default behavior of ObiSolver. However, simulating cloth in local space has two advantages: we will suffer no numerical precision loss when we wander away from the world's origin (which is essential for big game worlds), and the ability to control how much of the character movement is transferred to the cloth. So for character cloth, local space simulation is reccomended. In order to simulate actors in local space, we must set up the ObiSolver in a slightly different way:
- First, all ObiActors using the solver must be below it in the scene hierarchy. So in case of a character, the solver must be placed at the root game object.
- The solver should have "Simulate in local space" enabled.
In the included sample scene, you´ll notice the ObiSolver component has been added to the Man_trenchcoat object, and that "Simulate in local space" is checked. The trenchcoat object itself is a direct child of this object. You should mimic this setup as closely as possible when adding cloth to your own characters.
Now that we have the solver and the cloth in place, let's start with the simulation. Enter particle edit mode, select all particles that should be simulated (in our case, all trenchcoat particles from the waist down) and unfix them. You should end with something like this:

Now, by clicking "Optimize" in the ObiCloth inspector (see the optimization page for more info) we can get rid of all particles that won´t actually be part of the simulation, to concentrate resources on the ones we need:

Using tether constraints for a cloth this dense is almost mandatory if we want to prevent over-stretching (which can be a problem specially in fast-moving characters), so we hit "Generate tether constraints" in the cloth inspector. By doing this, Obi will automatically calculate the best tether configuration for our cloth. You can enable the "visualize" checkbox to get a visual preview of what the tether setup looks like for your mesh. In the case of our trenchcoat, all free particles have been automatically tethered to the waist in order to prevent stretching. If you want to know more about tethers, see this.
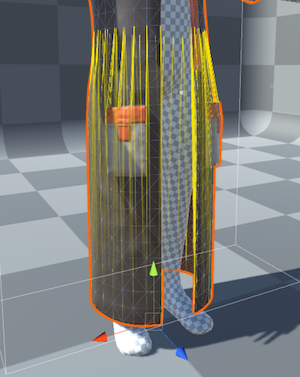
Up to this point, there's been not many differences in our workflow when compared to a simple, single layered cloth. However, if we were to simulate the trenchcoat at this point, we'd see lots of artifacts and self-intersections because the mesh has two-sides that cannot collide with each other. Also, it has pockets, zones of different thickness... it would be insanely slow
(and not very reliable) to try and simulate all of this using self-collisions.For this reason, we will use cloth proxies. The same mesh can act both as proxy source and target, and that's exactly what we´ll do here. Add a ObiClothProxy component to the trenchcoat, and you´ll see it only has two parameters: the source particle proxy (drag the trenchcoat itself here) and the skin map used to transfer the source simulation to the target mesh.
It's time now to author the skin map, which we will use to tell Obi which parts of the trenchcoat should be simulated, and which parts should simply follow the movement of the simulated part. In case of a trenchcoat, it is simpler to simulate the inner side of it, and skin the outside of the mesh -which has complex details- to it. Right-click on one of your project folders, and go to Create->Obi->Obi Triangle Skin Map. This will create a new skin map asset in your folder, rename it if you wish and check out its inspector:

Set the source topology to be the one you generated the cloth with, and the target mesh to be the mesh you want to drive. In our case, we´ll use the trenchcoat topology and the trenchcoat mesh, since it will be both source and target. Now click "Edit Skin Map" to enter
skin map editor:
Once in the editor, we need to tell Obi which parts of the source mesh are going to drive the target mesh, and which parts of the target mesh should be driven. This is done using skin channels. Vertices in the target mesh will only be skinned to triangles in the source mesh that share at least one skin channel with them.
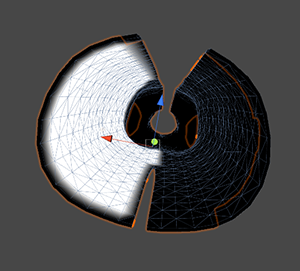
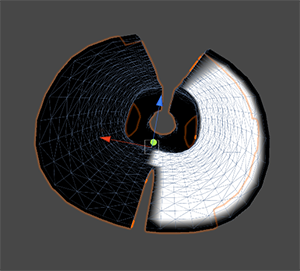
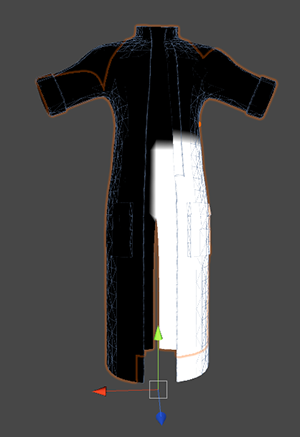
In the case of the trenchcoat, there's a cut at the back of it. Vertices at one side of the cut could accidentally be skinned to triangles on the other side, but we don´t want this to happen. The solution is to paint 2 skin channels: one for the left part of the trenchcoat, and another for the right part. This way, vertices won´t be able to latch to triangles on the other side of the cut. Skin channels 0 and 1 for the source mesh (seen from below, as they are inside the trenchcoat) Skin channels 0 and 1 for the target mesh. Once we are done painting our source/target skin channels, we can hit "Bind" and Obi will calculate and store the skin map for us. Now we are ready to use it, hit "Done" to close the editor and go back to the trenchcoat's ObiClothProxy component and feed the skin map to it. That's all! To wrap up, this is everything we did:

