Obi Stitcher
The Obi Stitcher component allows you to create stitch constraints between pairs of particles. This is useful when you need to attach actors to each other.
To stitch two actors together, add a ObiStitcher component to any object on your scene. This is how its inspector looks like:
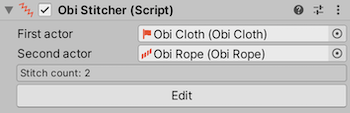
First actor
Actor that you want to stitch to the second actor.
Second actor
Actor that you want to stitch to the first actor.
It's important to note that both actors must be managed by the same solver (as any actors that need to interact with each other in any way need). Also keep in mind that both the first and second actors can be the same actor, in case you want to stitch together particles belonging to the same actor.
Editing stitches
Once both the first and second actor properties have been set, you can click the "Edit" button to start adding/removing stitches.
Adding stitches
Click and drag either end of the stitch tool to change the particles that will be stitched. Once you're satisfied with the position of the stitch, click "Add sticth" to add a new stitch between both particles.

Removing stitches
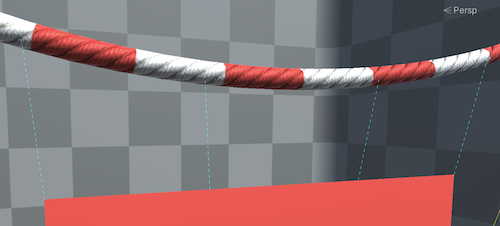
Click on a stitch to select it, its blue dashed line will turn red when selected. You can select multiple stitches by clicking them one after another, or click far from any stitch to deselect them all. Once all stitches that you want to remove are selected, click "Remove selected stitches".
Clearing all stitches
Click "clear all stitches" to remove all stitches.