Rope/rod rendering
At the end of each frame, after rope simulation has been performed, rendering takes place. There's several rendering components available, with different looks and performance characteristics. Most of them do not use the raw particle-based representation of the rope directly. Instead, an additional component named ObiPathSmoother generates a frame-based intermediate representation of the rope (optionally decimated, smoothed or twisted) that the renderers take as input.
ObiPathSmoother
Decimation
Threshold used to adaptively reduce the amount of rope frames based on its curvature. Internally, this uses an iterative variant of the Ramer-Douglas-Peucker decimation algorithm. Setting decimation to zero won't perform any reduction. Higher values will remove frames from straight sections of the rope, making rendering cheaper.
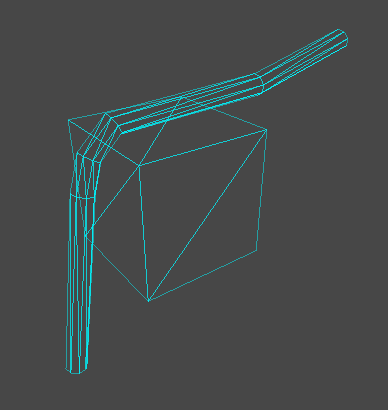
The following images show a rope rendered using a ObiRopeExtrudedRenderer in wireframe mode, to clearly see the effect of decimation:

Smoothing
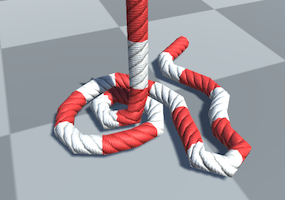
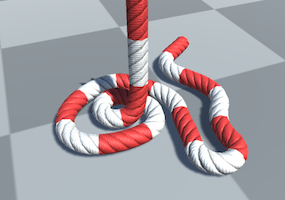
Smoothing iterations applied to the rope geometry after decimation. Internally, this uses a closed-form variant of Chaikin's corner-cutting algorithm. Setting smoothing to 0 will not perform any smoothing. Higher values will insert extra frames between the existing ones. Combining a low "resolution" blueprint value with a high "smoothing" value allows you to generate visually pleasing ropes that are made of very few particles.
Section twist
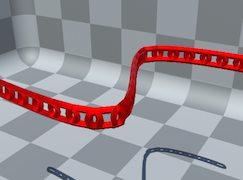
Twist in degrees applied to each rope section. For instance, if you want to make a chain where each link is twisted 90º with respect to the previous one, this value should be 90.
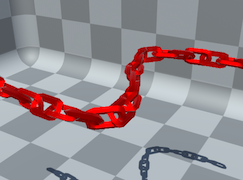
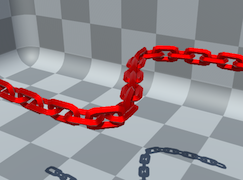
Rope renderers
After the path smoother component has generated a frame-based representation of the rope, the renderers use it to output visible geometry. Both ropes and rods support 4 different rendering components:
- ObiRopeExtrudedRenderer
- Extrudes a ObiRopeSection asset along the rope's main axis. This is the default renderer.
- ObiRopeLineRenderer
- Generates a camera-facing triangle strip along the rope's main axis, similar to Unity's TrailRenderer. This is generally much cheaper than ObiRopeExtrudedRenderer.
- ObiRopeChainRenderer
- Draws rigid mesh instances along the rope segments.
- ObiRopeMeshRenderer
- Deforms multiple instances of a mesh along the rope's path. This is the most most expensive renderer, and does not support resizing or tearing.
ObiRopeExtrudedRenderer
Generates a smooth, continuous mesh along the particles that make up your rope by extruding a ObiRopeSection. No manually authored mesh or geometry is needed. All is automatically generated.

These are this renderer's parameters:
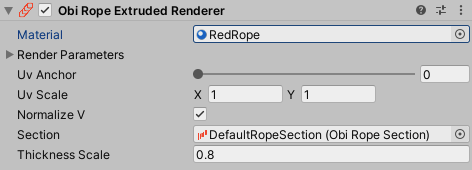
- Material: Material used to render the mesh.
- Render parameters: Various rendering parameters, similar to a standard MeshRenderer.
- UV Anchor: Point along the rope where the texture coordinate origin is placed. It is expressed in normalized coordinates: 0 is the start of the rope, 1 is its end.
- UV Scale : Scaling of the texture coordinates in the rope mesh.
- Normalize V : Forces the V texture coordinate to be 0 at the beginning of the rope and v-scale at its end. Enable this if you don´t want your texture to tile along the rope, but to stretch with it instead. Specially useful for ropes than use ObiRopeCursor to change their length.
- Section: Used to provide a custom shape for the mesh cross-section. The default asset is a 8-segment circle, but you can define your own shapes.
- Section thickness scale : Scales the actual mesh thicnkess with respect to the particle radius. A value of 1 will generate a mesh that fits the particle radius exactly. Larger values will make a mesh thicker than the particle representation, lower values will make the mesh thinner.
ObiRopeLineRenderer
Generates a camera-facing triangle strip, akin to trail rendering. This is much cheaper than the other methods, but has the disadvantage that the rope mesh must be generated once for each camera rendering it (instead of just once for all cameras).
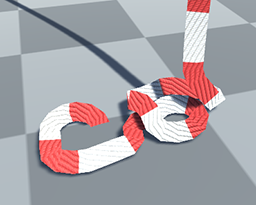
These are this renderer's parameters:

- Material: Material used to render the line.
- Render parameters: Various rendering parameters, similar to a standard MeshRenderer.
- UV Anchor: Point along the rope where the texture coordinate origin is placed. It is expressed in normalized coordinates: 0 is the start of the rope, 1 is its end.
- Section thickness scale : Scales the actual mesh thickness with respect to the particle radius. A value of 1 will generate a mesh that fits the particle radius exactly. Larger values will make a mesh thicker than the particle representation, lower values will make the mesh thinner.
- UV Scale : Scaling of the texture coordinates in the rope mesh.
- Normalize V : Forces the V texture coordinate to be 0 at the beginning of the rope and v-scale at its end. Enable this if you don´t want your texture to tile along the rope, but to stretch with it instead. Specially useful for ropes than use ObiRopeCursor to change their length.
ObiRopeChainRenderer
Spawns GPU instanced meshes in the spaces between particles. This results in a chain made of rigid links.
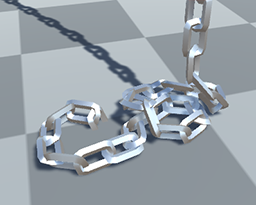
These are this mode's parameters:
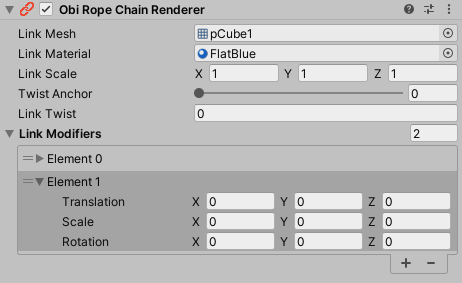
- Link Mesh : Mesh used to draw chain links.
- Link Material : Material used to draw the link meshes. Must support GPU instancing.
The material used for rendering the chain must support GPU instancing, and if you're using the Compute backend, it must support indirect drawing. Obi includes an example of a ShaderGraph indirect instancing shader, which you can find at Obi/Resources/ObiMaterials/Common/Instanced/Compute/ProceduralInstanced.shadergraph. - Link scale : Scale of the prefabs instanced along the rope.
- Twist Anchor : Point along the rope where twist == 0. It is expressed in normalized coordinates: 0 is the start of the rope, 1 is its end.
- Link Twist : Amout of twist between consecutive links in the chain, expressed in degrees.
- Link modifiers : List of transform modifiers applied to the links. First link in the chain will use the first modifier, second link will use the second modifier, and so on. When there's more links than modifiers, the chain will wrap around the list of modifiers and reuse them all over again. This is useful to create special effects like making every other link slightly bigger, or add semi-random rotation/offsets to links in the chain.
ObiRopeMeshRenderer
This is the most flexible rendering method, but also the most expensive. It will take a custom mesh and lay it out multiple times along the rope, deforming it to follow the rope's shape and movements. This rendering mode does not support resizing or tearing the rope.
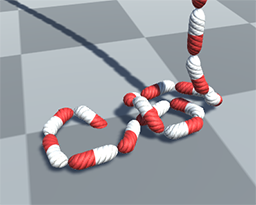
These are this mode's parameters:
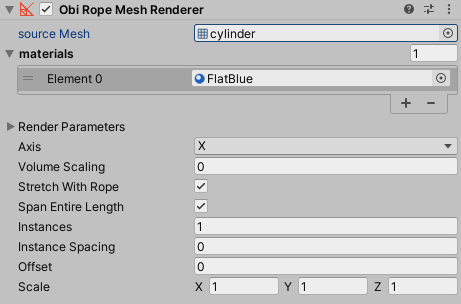
- Mesh: Reference to the mesh that will be deformed by the rope.
- Materials: Materials used to render the mesh.
- Render parameters: Various rendering parameters, similar to a standard MeshRenderer.
- Axis: Mesh axis (in model space) that will be aligned with the rope.
- Volume scaling: Controls how much the mesh will deform to try and maintain volume when the rope is stretched beyond its rest length.
- Stretch with rope: If enabled, the mesh will squash/stretch together with the rope. If disabled, the mesh will 'slide' over the rope when it length is over/under the rest length.
- Span entire length: If enabled, the mesh will span the entire length of the rope, even if it has to be stretched or compressed along the rope axis. If disabled, the mesh will keep its size along the rope axis regardless of rope length.
- Instances: How many times should the mesh be repeated along the rope.
- Instance spacing: Size of the gap left between mesh instances.
- Offset: Initial gap left before the first mesh instance.
- Scale: Scaling of mesh instances.
Baking meshes
ObiRopeExtrudedRenderer, ObiRopeChainRenderer and ObiRopeMeshRenderer components support mesh baking. This can be useful when you turn a rope into a static mesh for set dressing/world building without spending resources on runtime simulation. To do this, right click on your ObiRopeRenderer component and select "Bake Mesh" from the context menu. Unity will then ask you to save the mesh as an asset file in your project.