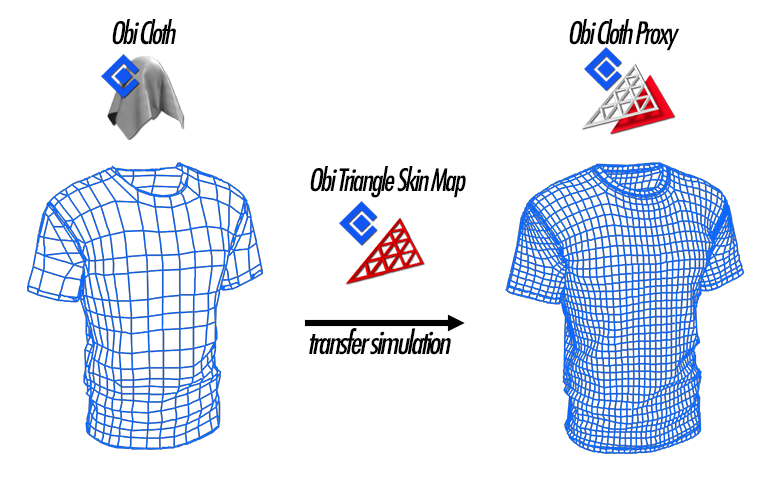
Cloth Proxies
Proxies let you "glue" high-quality, complex meshes to any simulated cloth mesh. This is used to decouple simulation and rendering: you can simulate a low-resolution mesh and render a high-resolution one. It is also useful when the mesh you want to render has complicated shapes that should be preserved as intact as possible (like pockets, holes, variable thickness), or is non-manifold and cannot be simulated directly.
To set up a proxy, you need to have:
- A source object, with an ObiCloth component attached.
- A target object, with an ObiClothProxy component attached.
This way the simulation will be transferred from the source object mesh to the target object mesh. Note that the source object and the target object can be the same: you can simulate only certain triangles of the mesh and use the result to drive the rest. Now we will see how to set up a proxy in detail.
Setting up proxies
Assuming you have a source object already set up (ObiCloth component added and correctly iniitialized), you must now decide which object will be the proxy. Then, add an ObiClothProxy component to that object:

There are three inputs to a proxy:
- Particle proxy
- This is the source object used to drive the proxy.
- Skin map
- This is an asset that tells Obi which parts of the source object should drive which parts of the target.
- Target topolgy
- This is the topology of the target mesh. It is used to speed up the skinning process.
Most likely, you only have the particle proxy available at this point: this is your cloth object, that will be used to drive the proxy. Generating the target topology is done exactly like generating a topology for a cloth, so just a quick reminder here: right click on any project folder, Create->Obi->Obi Mesh Topology, set the input mesh and click "Generate" in the inspector.
We're still missing the skin map. To create one, right click on one of your project folders and go to Create->Obi->Obi Triangle Skin Map:
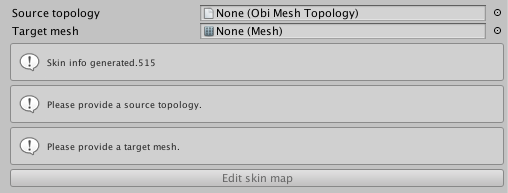
There are two inputs to it: source topology and target mesh. The source topology is the same topology you used to generate your cloth, and the target mesh is the mesh of your proxy object.
Provide both inputs and click "Edit skin map" to enter the skin map editor:
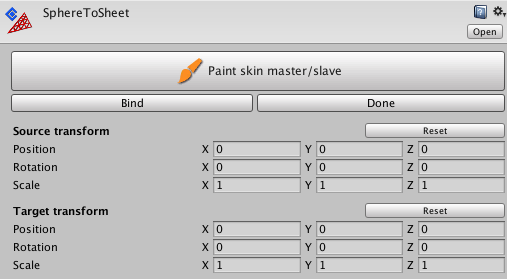
Inside the skin map editor you need to adjust the relative position/rotation/scale of both meshes, as it will be their bind pose. Now, if you just want the whole target mesh to be skinned to the entire source mesh, just click "Bind". This will bind the target mesh to the source mesh in their current pose, and generate the appropiate skin information.
In case you need finer control over how the target mesh is skinned to the source mesh, the skin editor has a few more advanced tools at your disposal that we will explain later.
Once you've generated the skin map, you can exit the editor by clicking "Done". This will close the editor and return you to your previous scene.
Feed the skin map to the ObiClothProxy component, also provide the target mesh topology and the source cloth, and you're done. If you play your scene, the target mesh will follow the source simulation. In some cases you´ll want to disable the MeshRenderer of the source object, so that only the target mesh is visible.
Some final considerations: