Thread Rating:
  • 0 Vote(s) - 0 Average
  • 1
  • 2
  • 3
  • 4
  • 5
Issue with skin maps
#1
Hi,

Using the sample scene, with latest official Unity (19.2.18f1), I want to create my own skin map. I right-click in the project window next to the
Trenchcoat skin map and select Create/Obi/Triangle Skinmap. I assign Trenchcoat blueprint in Master Blueprint and Body_basemesh1 in Slave mesh. Then, I click on the Skinmap and "Edit Skin Map" button. I click Bind, wait for the operation to finish and Done. Finally, I assign this new skin map in Obi Cloth Proxi component, under the skin map field.

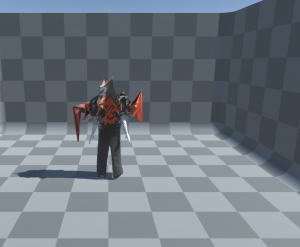
Well, when I press play, all the upper part of the mesh is completely distorted. What am I doing wrong?
   
Reply
#2
(20-01-2020, 09:14 PM)ArsMagica Wrote: Hi,

Using the sample scene, with latest official Unity (19.2.18f1), I want to create my own skin map. I right-click in the project window next to the
Trenchcoat skin map and select Create/Obi/Triangle Skinmap. I assign Trenchcoat blueprint in Master Blueprint and Body_basemesh1 in Slave mesh. Then, I click on the Skinmap and "Edit Skin Map" button. I click Bind, wait for the operation to finish and Done. Finally, I assign this new skin map in Obi Cloth Proxi component, under the skin map field.

Well, when I press play, all the upper part of the mesh is completely distorted. What am I doing wrong?

Did you paint appropriate skin channels? If you take a look at it, you will notice that the trenchcoat blueprint does not have particles for all mesh vertices (the upper body is not simulated), so many parts of the slave mesh will be bound to incorrect parts of the master (blueprint) if using the default "bind everything to everything" settings. In particular, the upper part vertices will bind to the closest particles: the lower part.

You can see here how skinmaps are supposed to be used:
https://www.youtube.com/watch?v=IWXSJJAu...JQ&index=7
Reply
#3
(21-01-2020, 08:52 AM)josemendez Wrote: Did you paint appropriate skin channels? If you take a look at it, you will notice that the trenchcoat blueprint does not have particles for all mesh vertices (the upper body is not simulated), so many parts of the slave mesh will be bound to incorrect parts of the master (blueprint) if using the default "bind everything to everything" settings. In particular, the upper part vertices will bind to the closest particles: the lower part.

You can see here how skinmaps are supposed to be used:
https://www.youtube.com/watch?v=IWXSJJAu...JQ&index=7
Oh! Thanks! Great video by the way. I have to say I really like Obi Cloth so far. Quite incredible to have all that power inside Unity! However, I have to say that the in-asset documentation is not super clear nor super updated. For example, under Cloth Proxies in the official manual, the fields shown for the Proxy component do not even match the ones inside Unity! Also, concerning skinning the only thing that is written is the following:

In case you need finer control over how the target mesh is skinned to the source mesh, the skin editor has a few more advanced tools at your disposal that we will explain later.

I think if you could simply copy the link to the video you just shown me, it would make learning how to properly skin quite simpler!

Obi is awesome! With a more user-friendly documentation, it would be almost perfect Guiño.
Reply